Supplies you need: foam cup, cardboard (or card stock), ribbon, scrap fabric, embellishments, exacto knife, scissors, pen, hot glue (and spray adhesive that actually works is helpful)
Using the exacto knife (carefully) cut the lip and base of the cup off. Keep the lip (this will become the bottom of your hat) and discard the base.
peek-a-boo
Next, you need to cut circles of cardboard for the base bottom and hat top. Use the uncut edge of the lip for the base and the widest end of the cup for the top.
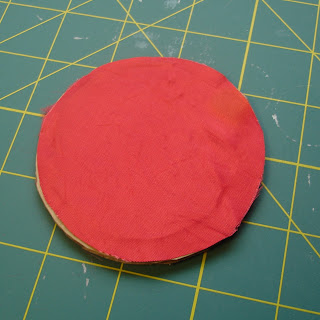
Using the base circle as a template, cut 2 circles out of your fabric and attach one to each side of the cardboard. This is where I planned on using the spray adhesive, but used hot glue since the can was missing the nozzle. Trim any excess fabric with scissors. Don't worry too much about the cardboard showing, we'll hide that later!
Take some ribbon and hot glue one end on the inside of the cup lip. Carefully and snugly, wrap the ribbon around until the entire lip is covered. Trim off any excess ribbon and hot glue the end in place.
ta-da!!
Next, you need to attach the fabric covered cardboard to the ribbon wrapped lip. Since we traced the widest (uncut) part of the lip onto the cardboard, this is side you are going to hot glue to the fabric base.
Now, you're going to cover the exposed cardboard edge. I used a double layer lace, but ric rac, other ribbon or whatever you have to hide the cardboard is fine.
Completed base! I flipped the lace up to kinda look like a ruffle.
For the top, hot glue the cardboard round to the wide opening of the cup.
Cut strips of ribbon, hot glue one end to the inside of the opening, snugly wrap it over the closed end and hot glue the other end of the ribbon to the inside of the opening.
Like so. Keep going until the entire cup is covered.
Almost done! Next, you need to hot glue the top and base together to complete the hat.
Yay!! Now for the fun part... embellishment! The sky is the limit, go CRAZY!
I grabbed a couple of my fabric flowers and some buttons that I glued together, and hot glued them to the front of the hat.
For keeping it on my head, I opted to use a headband. Put a dot of hot glue in the center of the underside of the base and attach the headband (I set mine off center so it rests slightly off to one side of my head). Then put some hot glue on a piece of felt and secure that over the headband, just to make sure it stays put.
Then have your silly child put on your mini top hat and make a funny face. Take a photo and have blackmail material for when she starts dating!!


